When flooding strikes a hospital, imaging equipment worth millions of dollars is at immediate risk. Acting within the first 24–48 hours dramatically improves the chances of successful restoration. This protocol outlines exactly what to do.
Immediate Safety Actions (First 2 Hours)
1. DO NOT enter the imaging room until facility management confirms that all electrical circuits feeding the room have been de-energized and locked out/tagged out (LOTO) at the main distribution panel.
2. If the MRI magnet is still energized, do NOT enter the 5-gauss line. Contact the OEM or Elesonic Group's 24/7 hotline immediately — a controlled ramp-down may be needed before anyone enters.
3. Activate your facility's emergency response plan. Notify your equipment service provider, insurance carrier, and local health authority within the first 2 hours.
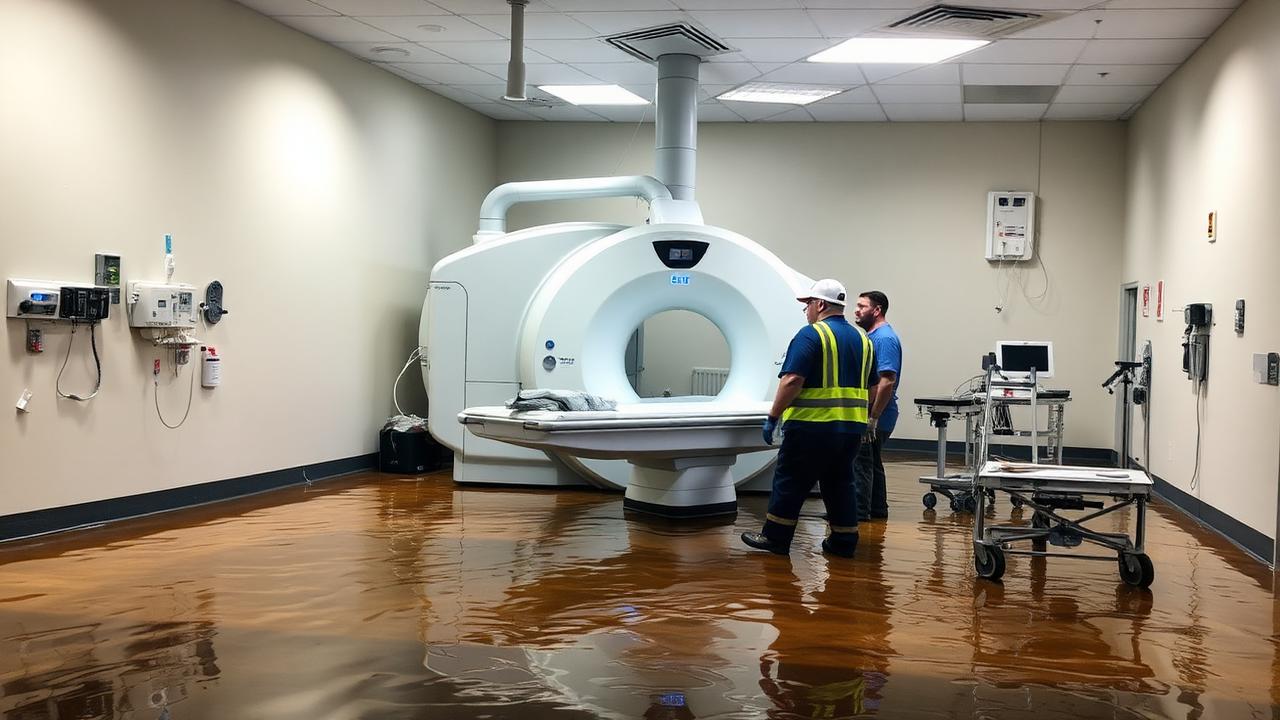
4. Document everything with timestamped photographs and video before any cleanup begins. This is critical for insurance claims and OEM damage assessment.
Damage Assessment (Hours 2–24)
Once the room is safe to enter, a qualified biomedical engineer should assess damage in this priority order:
1. Water ingress level — measure the high-water mark relative to critical components. For CT, the gantry electronics bay is typically 30–60 cm above floor level. For MRI, the gradient amplifier cabinet is the most vulnerable floor-level component.
2. Water type — clean rainwater is far less corrosive than sewage-contaminated floodwater. Contaminated water requires professional hazmat decontamination before any equipment work.
3. Submersion duration — electronics submerged for < 24 hours in clean water have a 60–80% recovery rate. Beyond 48 hours, or with contaminated water, recovery rates drop below 30%.
4. Create a detailed inventory of every component that was submerged, splashed, or exposed to high humidity. Include serial numbers and photographs.
Drying and Decontamination (Days 1–7)
Speed is critical. Corrosion begins within hours on wet PCBs and connectors.
1. Remove all accessible electronic boards, power supplies, and cable assemblies. Rinse with deionized water to remove contaminants, then begin controlled drying.
2. Use industrial dehumidifiers and air movers to reduce room humidity below 40% RH. Target 25–30% RH inside equipment cabinets using desiccant-based dehumidifiers.
3. DO NOT use heat guns or hair dryers on circuit boards — thermal shock can crack solder joints and damage ICs. Use room-temperature forced air or a drying oven set to ≤ 50 °C.
4. Motors, transformers, and high-voltage components (X-ray tube housing, generator tank) should be megger-tested for insulation resistance before any power is applied. Minimum acceptable reading: 1 MΩ at 500V DC.
5. Replace all items that cannot be adequately dried or decontaminated: filters, gaskets, cable assemblies with braided shielding, and any component showing visible corrosion.
Restoration and Testing (Days 7–30)
1. Reassemble the system with all dried/replaced components. Apply conformal coating to restored PCBs for long-term corrosion protection.
2. Power up in stages: first the console/workstation, then individual subsystems (gantry drive, detector, X-ray generator), and finally the complete system.
3. Run full QA acceptance tests identical to a new installation: image quality phantoms, dosimetry, mechanical accuracy, and electrical safety (leakage current, ground continuity).
4. Perform a burn-in period of 48–72 hours of continuous operation before returning the system to clinical service.
Elesonic Group has restored flood-damaged imaging equipment in Nigeria, the Caribbean, and India. Our disaster recovery team can be on-site within 48 hours of notification.
Insurance and Financial Considerations
Equipment insurance policies typically cover flood damage, but claims require thorough documentation. Key items: pre-event maintenance records proving the equipment was in good working order, timestamped damage photographs, a professional damage assessment report, and itemized repair/replacement cost estimates.
In many cases, professional restoration costs 30–50% of full replacement cost. Present both options (restore vs. replace) to your insurance adjuster with supporting technical documentation.
Elesonic Group provides detailed damage assessment reports and repair cost estimates formatted for insurance submission. We also offer bridge equipment (refurbished systems) to maintain clinical operations during the recovery period.
Prevention: Flood Preparedness for Imaging Departments
1. Elevate critical floor-level components (gradient amplifiers, power distribution units) on 15–20 cm raised platforms where local flood risk exists.
2. Install water sensors with audible alarms in the imaging room and equipment chase areas.
3. Keep a flood response kit readily accessible: plastic sheeting for covering equipment, sandbags, a wet/dry vacuum, and contact information for your service provider and insurance carrier.
4. Include imaging equipment in your facility's annual disaster preparedness drill. Practice the LOTO procedure and know the location of main electrical disconnects.
5. Ensure your insurance policy explicitly covers flood damage to imaging equipment, and review coverage limits annually as equipment value changes.